Assemblies in Allocadence are for a “Build To Stock” scenario, where you prepare the new finished product in advance of any orders for it. For product kits/bundles that are “Built To Order” instead and are assembled during the fulfillment process rather than in advance, use our Kit feature instead.
Work orders allow for a two-step assembly process, where one user initiates the assembly, choosing the product to build along with the quantity, and leaves the work order in the system to be assembled at a later time (or by another user). If your need is for a one-step simple assembly process, use Assemble Now instead.
Creating a Work Order for assembly
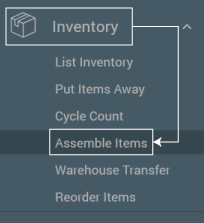
- From the inventory section, select “Assemble Item” in the submenu.

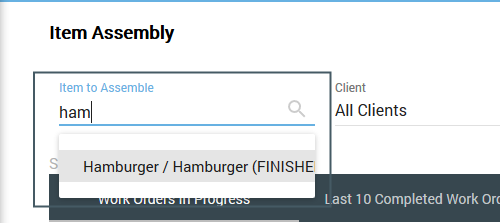
- Search for the specific item you would like to build by typing a SKU or description in the “Items to Assemble” field.

- Choose a quantity of the assembly to build. Click “Create Work Order“.

- A work order will print the list of components needed along with their location. The assembly is not yet complete; that will be done in a second step when the work order is claimed and completed.
Completing the assembly work order
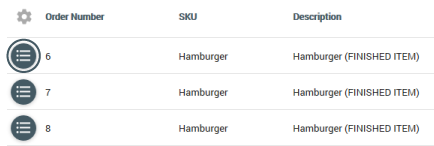
- From the Assemble Items screen, click on the “three bar icon” to the left of the order number and select “Assemble“.

- Claim the work order by clicking the orange “Claim” button.

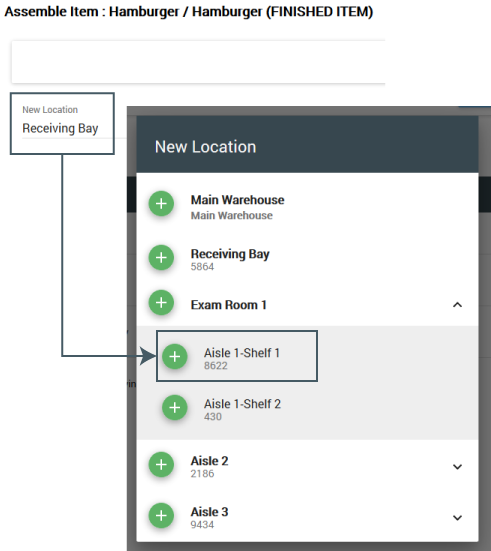
- Next, you will assign a location for the new finished item by clicking the “New Location” field and choosing a location from the popup menu .

- If you need to make any changes to the location you pulled the components from, click “Change Allocation” and alter the quantities appropriately.

- Click “Assemble” to finish the process. All components will then be deducted from inventory, and the new finished product(s) will be added to inventory automatically.
