
Warehouses are separate locations where inventory is kept. Warehouses consist of two components, the Warehouse profile and the Location Tree.
To create a new Warehouse
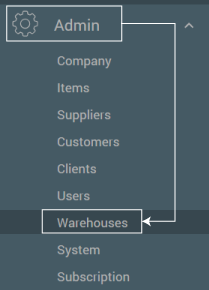
- Navigate to “Admin“, and select “Warehouses” from the drop down menu.
- Click “Add New Warehouse”

- Fill out the Warehouse profile.
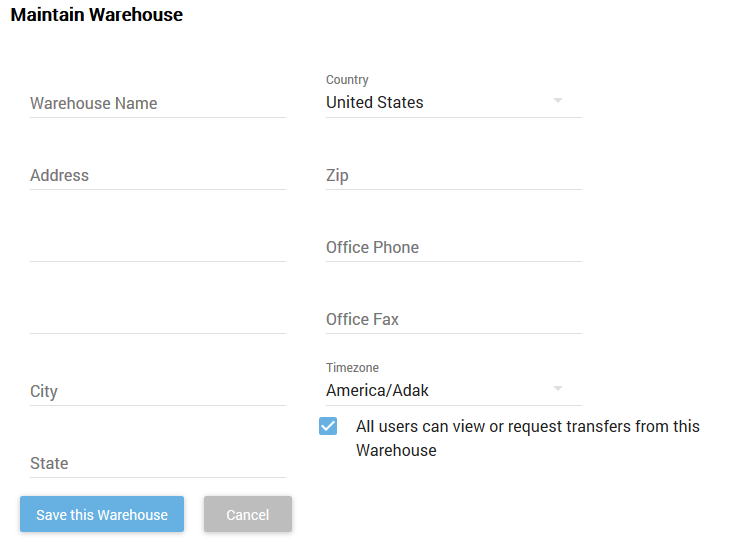
- Save the Warehouse profile. It will appear on the Warehouse page and can be edited along with its Location Tree.
NOTE: The check box at the bottom of the page allows other users to request a warehouse transfer order from the warehouse, and also allows other Users to view the inventory in the warehouse from the Inventory page.
To edit an existing Warehouse
- Navigate to “Admin“, and select “Warehouses” from the drop down menu.
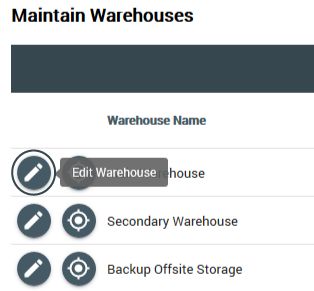
- Click the “Edit Warehouse” icon to the left of the warehouse to be edited.
Location Trees
The Location Tree is a hierarchy of locations with parent-child relationships. A Location Tree can consist of a single location or a complex map of locations, but must contain at least one location where inventory can be stored after being imported or received. It is entirely up to the account administrators to decide how simple or complex the Location Tree should be.
- The Order Fulfillment process references locations for allocation and picking.
- The Inventory Management Tool is built around the requirement of items to be put away at a location.
- To manage a warehouse’s Location Tree, click the Location icon next to the warehouse.
To create a new Location
To create a new location, click one of the Add Location buttons in the Location Tree toolbar.
There are three options when creating a new location:
- From the Warehouses window click on the “Crosshair” icon to the left of the warehouse you want to edit.
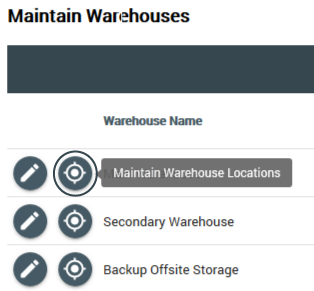
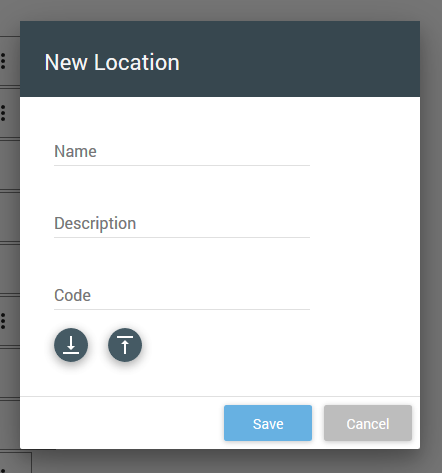
- Click the blue “Pinpoint” icon to “Add New Location“.

- Enter in Location Name, Description and Code if applicable. Click “Save”
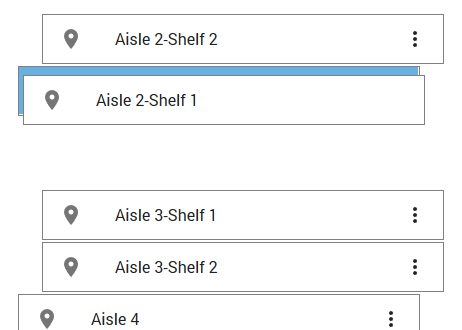
Create child location – only available if a location from the Location Tree is selected as reference.
If a location in the Location tree is highlighted, the new location will be created in reference to the selected location.
NOTE: Remember to save changes to the location tree after adding or editing locations.
- Drag the location into the right folder to “Add new child for selected location”
- Enter in information for child location and click “Save Structure” at the top of the screen.
- A description is optional and for user reference only.
- A location code is a code to be used in imports for assigning imported inventory to a location, or for creating new locations via the import within a Location Tree.
Setting default Locations
One location in a Location Tree may be marked as the Default Location for the Warehouse. Items will be staged at this location during receiving and put away processes.
Managing Locations
Locations may be moved around within the hierarchy, edited, and deleted. Use the Location Tree Toolbar to perform any of these actions. Location labels may also be printed by highlighting a location and clicking the Label icon in the toolbar.
NOTE: Labels may be printed to PDF format to be printed from a non-thermal printer, or printed directly to a thermal label printer. See Printing help document for more information.